With some annual leave available, I took the opportunity for a game using more of my Napoleonic collection, about 1500 figures on a 6'x12' table this time, and testing out the General d'Armee rules at this scale. Here's an account of the action!

Scenario Planning
I fancied doing something with a bit more flavour than just a 'line up and fight' game for this one. So I organised a historical-ish(!) 1813 clash centred around the villages of Markkleeberg, Dolitz and Dosen. French and Poles defend the villages and bridges on the east side of the Pleisse river. Austrians start with a force on the west side of the Pleisse river and are trying to force their way across two bridges, as the river is otherwise impassable. The rest of the Austrian force is struggling across fords further south and will be arriving later from reserves on the east side of the Pleisse river.
In the photo below looking west, Dosen in the foreground, and Markleeberg and Dolitz in the background near the Pleisse river.

As for forces, I used slightly scaled down versions of historical 1813 corps and divisions. For ease of play, each unit was standard sized, but representing approximately 800-1000 infantry (24 figures), 400-500 cavalry (12 figures), and a pair of artillery representing a battery of guns. In other words each standard sized battalion represented one large battalion or a regiment of 2-3 smaller ones. A bit of fudging but as game size increases such lower level details become less of a focus.
In 1813 many units were understrength, and hence most of these 'Brigades' are actually divisions. Given the size of this game most of VIII Corp, IX Corp, IV Cav Corp, and 2 Guard Divisions were on table for the French (as those first three Corp were smaller ones). Austrians had most of their II Korp, Reserve Army Korp, and a division each from IV Korp and Reserve Cuirassier Korp, and some reserve artillery on table. So a multi-Corp action, but for rules purpose every division was just a 'Brigade' in command rule terms, with a single CinC for each side.
The French have 6 on table brigades and 2 in reserve, and 8 ADC's. Their initiative roll is at +1.
The Austrians have 3 on table brigades, 5 in reserve, and 7 ADC's. Their initiative roll is a +0.
The reserve brigades were only available in the reserves pool once they had rolled to arrive successfully. This needed a D6 roll of 6+ on turns 2 and 3, 5+ on turns 4 and 5, and 4+ on turns 6 onwards, rolled separately for each brigade.
Victory points (if it came to that) were 5000 points for each village held at the end of the game, plus a number of points equal to that of all opposing brigades destroyed (points for each brigade shown below). Cavalry Brigades worth double points, and French Guard Brigades worth double points again.
French Forces - Prince Poniatowski
French - (18 000 Infantry, 3 500 Cavalry, 58 Guns)
Brig Kamienecki -- 4500
4 Veteran Polish Line, 1 Krakus Cav, 1 Foot Bat,
Brig Lefol - 2000
1 Veteran Polish Line, 1 Recruit Erfut Line, 1 Foot Bat
Brig Graombouville - 4000
4 Line, Foot Battery
Brig Semele - 4000
4 Recruit Line, Foot Battery
Brig Tolinkski - 1000
2 Campaign Chasseur, 1 Horse Battery
Brig Sulkowski - 1000
2 Veteran Uhlan, 1 Horse Battery
RESERVES:
Young Guard Brig Decouz - 4000
4 Young Guard Veteran Line, 1 Foot Battery
Guard Cavalry Brig d'Ornano- 1000
1 Empress Dragoons, 1 Dutch Lancers, 1 Guard Horse Battery
Austrian Forces - Erbprinz F. von Hessen-Homburg
(23 000 Infantry, 3 500 Cavalry, 52 Guns)
Brig Lederer - 5000
1 Grenz, 3 German Line, 1 Dragoon, 1 Veteran Hussar, 1 Foot Battery
Brig Liechtenstein - 6000
4 German Line, 2 Recruit Landwehr, 1 Foot Battery
Artillery Reserve
1 Foot Battery, 1 Heavy Position Battery
RESERVES (EAST SIDE OF RIVER):
Brig Mohr - 2500
1 Grenz, 1 Chevauleger, 2 Veteran Hussar, 1 Cavalry Battery
Brig Rothkirch - 1000
2 x Veteran Cuirassier, 1 Cavalry Battery
Grenadier Brig - Wiessenwolf - 4000
4 x Veteran Grenadier
Brig Beck - 4000
4 x Hungarian Line
Brig Haugwitz - 4000
4x German Line, 1 Foot Battery
The Game
Ion commanded the Austrians and Paul the French, while I concentrated on getting the rules right as Ion and Paul were new to them and I had also only played one game before. All figures and terrain were from my own collection in this instance.Below, the Austrians begin their advances on the bridges. Looking east from their position.


The Poles calmly await them at the southern bridge.


And the French conscripts await them not so calmly at the northern bridge...


Austrian Dragoons and Hussars wait at the rear, not much to do until a bridge is captured...

In the centre, the Polish light cavalry advances and unlimber their horse artillery ready to meet the arriving Austrians.

After a series of protracted command difficulties for the Austrians, the first of them do finally arrive east of the Pleisse river about turn 4 or so. Light Cavalry Brigade Mohr. The Austrian Ott Hussars atop a hill and end up taking several turns of long range artillery fire, rather than seeking shelter behind the hill. Hussar bravado...

The Austrians west of the Pleisse are moving forward slowly, often hesitating as Homburg is concentrating on organising his reserves. But eventually they get into position and Polish and Austrian lines exchange fire across the Pleisse.


In the centre Chasseurs charge the Austrian Ott Hussars who countercharge. The Hussars have already been weakened by artillery fire, and both sides take heavy casualties in a first round of melee.
Rules note: Each side starts with 5 dice rolls each needing 4+ to cause a casualty; Chasseurs have -1 die for being campaign class cavalry (i.e. they have poor quality horses) vs battle cavalry, so roll 4 dice total. Ott Hussars have +1 die for being veteran but -1 for having 4+ casualties so roll 5 dice total. Each side takes 3 casualties in the first round, putting the Chasseurs at 3/12 casualties, and the Ott Hussars at 10/12 casualties (due to previous artillery casualties!).
A draw and both sides fight on with a second round of combat.

The Austrian Ott Hussars are exhausted (having taken 12/12 casualties now) and disperse from the field. The Chasseurs are also spent though and retire to their own lines to reform.

The Austrian lines at the southern bridge take heavy casualties as the veteran Poles pour disciplined volley's into them.

Looking west, the Austrian Cuirassiers are now here and in the foreground, and Hungarians are arriving and advancing on Markkleeberg in the background.

The second Chasseur formation charges an Austrian Cavalry Battery in the centre, but a blast of cannister sees them retreating back with heavy casualties.

The Hungarians begin the attack on Markkleeberg and the vulnerable corner of the French position (held by Poles as is typical). Germans arrive to back up the Hungarians.


On the right the Austrian Heavy Cavalry General is hesistant in advancing further, much to the frustration of Erbprinz Homburg.

The ever popular Homburg Hussars dart this way and that. Retreating Chasseurs are top left, having taken 8/12 casualties.

Meanwhile the firefight across the Pleisse continues. An Austrian battalion breaks and flees under fire and another follows it shortly thereafter. The Austrian Brigade does not falter though and continues the attack. The loss of the Austrian infantry is not in vain either, as it has covered the deployment of a massed Austrian Battery, which now begins to cause havoc on the Poles on the opposite bank.

The Austrian Cuirassiers again failing to do much except sit uncomfortably in the face of some artillery, though it is long range at least.

The French Young Guard has arrrived to guard the French left flank, forming square and deploying their artillery to oppose the Cuirassiers.


...as the Poles suffer catastrophic casualties from massed Austrian artillery, and the first Polish unit guarding the bridge disperses.

The Markkleeberg garrison is taking a pounding but resisting so far, throwing back the first Hungarian infantry assault.


Last of the Austrian reinforcements arrive, Austrian Grenadiers march towards Dosen.


Another Hungarian formation is thrown back after assaulting Markkleeberg, but the garrison is hard pressed.

And Poles defending the bridge are faced with an impossible task, being attacked from multiple directions and under artillery fire, trying desperately to extricate themselves.


The Austrians start pushing hard at the northern bridge too.

A view from the west side of the Pleisse down the table.

Poniatowski calls on the French Guard Cavalry, and Empress Dragoons and Red Lancers join the mass of cavalry in the French centre.


Poniatowski decides the time has arrived and orders forward all the Polish Uhlans and Chasseurs!

The attacks develop around Markleeberg, the Austrian infantry closing in for the kill as the Polish cavalry advance to save their comrades.


The moment of decision! Austrians storm across the bridge and into the flank of the Poles, routing and dispersing them.

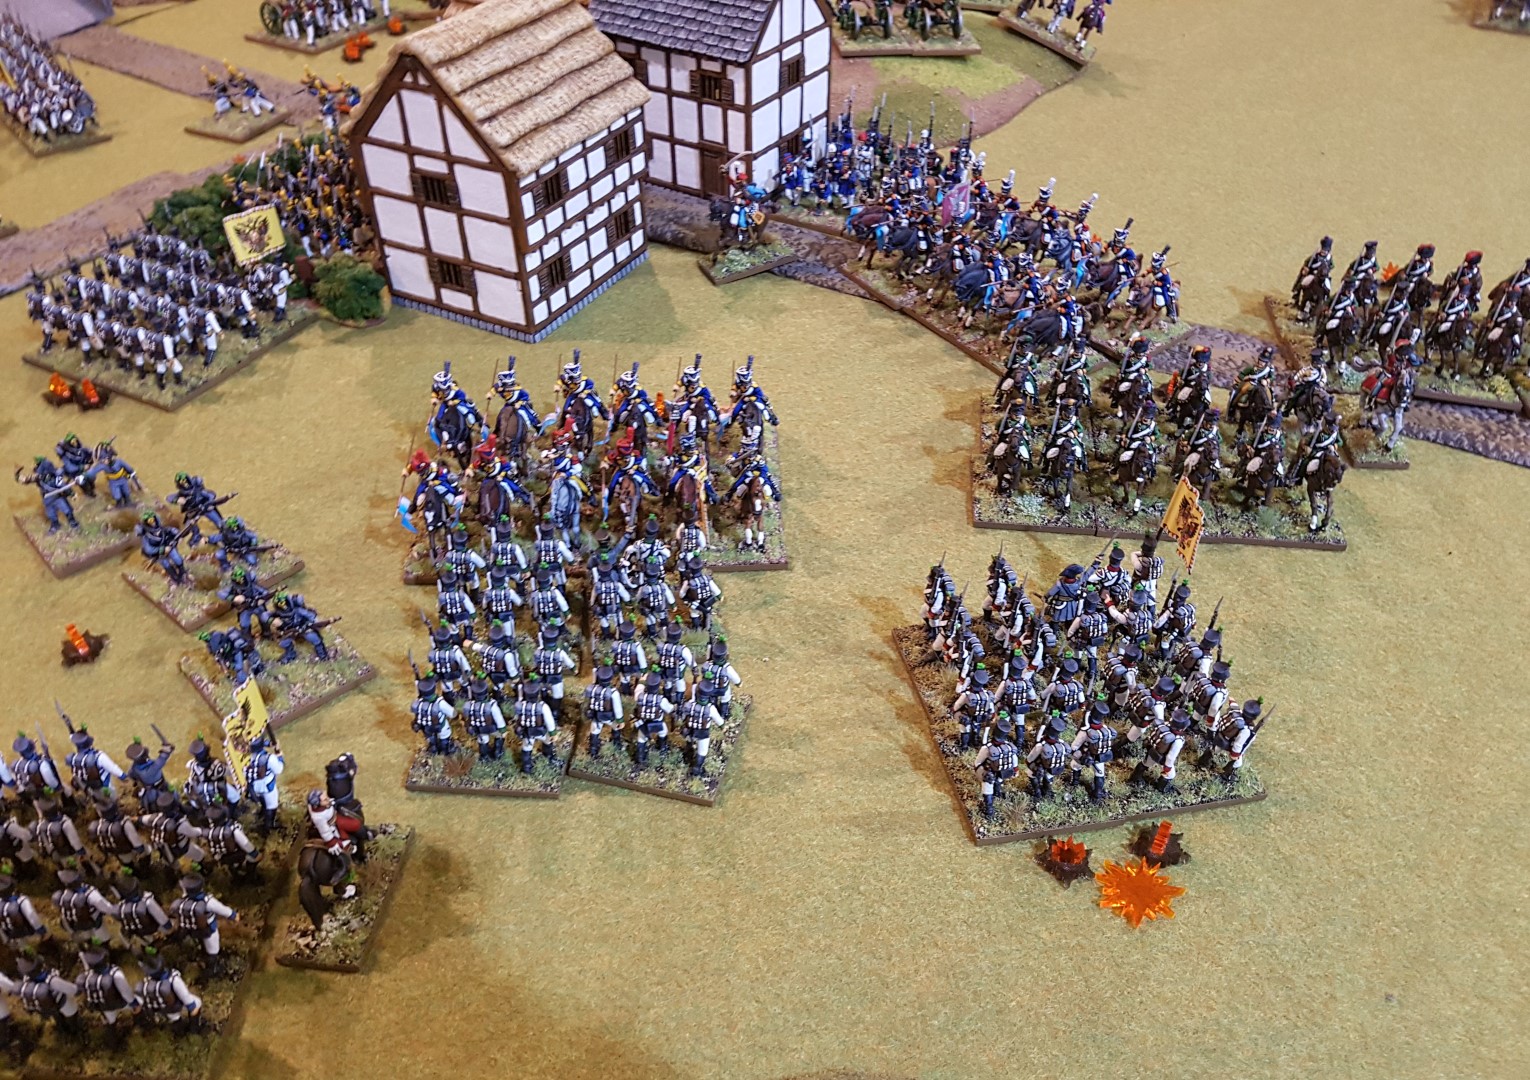
In the centre German infantry assault Markkleeberg while massed Polish Uhlans and Chasseurs charge supporting Hungarian and German infantry.
The Hungarian unit is in line preoccupied firing at Markkleeberg - they fail to form square, break and disperse before the the oncoming Polish Uhlan charge!

The Uhlans charge on and close with a German column. The Germans don't have time to form square but do hold as the Lancers close, firing a last second ineffective volley at them...
To their right another German unit does manage to form square and sees off the Chasseurs.

A look at the table just before the melee phase of the turn.


The Germans assaulting Markkleeberg are thrown back, though they inflict more damage on the defenders. The Polish Lancers ride down the Germans and take the ground, having now destroyed two Austrian units this turn!

Another piece of bad luck for the Austrians, as the Brigadier of the Grenadiers is killed by a long range artillery shot! Unmoved one Grenadier battalion has formed square and the others push on. Probably weren't keen on the fellow anyway...

But now disaster unfolds as the Hungarian Brigade decides that fighting for Austria is a really bad idea and they quit the field!
Rules note: They failed their falter test despite a reroll, then rolled a 1 and so disperse. (The Germans, Grenadiers and Poles all passed their respective falter tests this turn).


On the French left, the Young Guard is holding firm, as the Austrian cavalry attack stalls, a Cuirassier unit being unformed by artillery fire.

Looking from the French centre, fresh cavalry and 3 batteries of horse artillery promise grim times ahead for the isolated Austrian infantry, which are now trapped in square by roaming Polish cavalry.

The vengeful Polish Uhlans charge on and run down an artillery battery, the cannister blast aimed at them going high. Three victories and counting for these Uhlans.

A few Austrian skirmishers cross the northern bridge and the French conscripts start firing in wild and ineffective abandon, ignoring their officers and losing fire discipline.

Looking east again, at the much depleted Austrian forces over the Pleisse.

With the Austrians now outnumbered in both quantity and quality, facing reinforced positions and out of position with their cavalry, we agree that it is time for a general Austrian retreat. It's also 10pm (having started about 2pm with a break for dinner!). Given the situation I decide against continuing on the morrow.


A few more pics. The Austrian assault across the southern bridge is about to be counterattacked by more cavalry and they have formed square in preparation, effectively ending the Austrian pressure here.


The French centre. Four fresh and veteran cavalry formations plus three horse batteries promise a bad day for the unsupported Austrian infantry if they remain. Ion decides a circumspect withdrawal and consolidation with reinforcements is the order of the day for the Austrians.

Conclusions
An entertaining time was had, including by me even if I was just acting as the rules person for most of this introductory game (I did briefly control the French for a couple of turns until Paul arrived). The scenario was definitely a tough ask for Ion in command of the Austrians, and would doubtless be improved in balance if the Austrians had an extra couple of Brigades. The loss of the Hungarians just as the Austrian cavalry was committed on the right flank (and thus unavailable to save the Austrian infantry) was pretty decisive end to the affair. Though the Austrians were starting to become quite fatigued even without this loss I think.
The basic rule mechanisms seemed to be picked up easily by both Ion and Paul within a couple of turns, though finer details of charges and less common occurrences required checking of the rulebook. Both sides struggled with the friction the command generates, but mainly the Austrians who were trying to bring on reserves and co-ordinate attacks. You can't do everything you want to each turn so have to prioritise. I like this feature but it made an already tough situation for the Austrians even tougher than I had intended it to be! I also think I over-represented artillery a bit on both sides given the scaling, though it would also depend on how much reserve artillery one assumes would be involved I guess.
(Edit: Also I'm pleased to report Ion has just done this nice report from the Austrian perspective!).
Anyway overall I was happy with how it all ran, so onto bigger and grander plans...
Here's a photo the next day... living the Napoleonic dream, and working out how to get another 8x6 table expansion in....:)

Mark, I enjoyed that game, and I enjoyed the challenge. I knew from the get go it was going to be a tough ask. Getting the hang of the ADC system of bring troops into action AND coordinating assaults may take more that this game, and even the next. I think I was a bit lucky, too in winning the initiative for the last 5 turns in a row.
ReplyDeleteFrom the narrative point of view, the effect was quite pleasing: mounting Austrian pressure building thoughout the day until it seemed that Markkleeburg (?) itself must fall, and then the day decided by the heroic charge of the Polish Uhlans, which effectively broke the already worn down Hungarians, and mauled the German brigade as well. Very much a build to a climax and an unexpected denouement.
Thanks for the game, and for dinner! Wouldn't mind giving it another go some time.
Thanks Ion, and for taking the Austrian command!
DeleteWonderful battle report Mark and once again so many tremendous looking troops and terrain. Your observations concur with everything I have read of these rules and I am quite excited about these rules going forward. Cheers and looking forward to more of your excellent reports.
ReplyDeleteCheers Carlo, looking forward to the next one too! :)
DeleteReally impressive looking game!
ReplyDeleteMany thanks Rod!
DeleteBeautiful table and great to see your troops deployed and in action. Tough day for the Austrians as a win for them seems not in the dice this day.
ReplyDeleteGreat stuff, Mark!
Thanks Jonathan, yes good to get a good amount of them on the table!
DeleteWhat a great looking game, impressive mass effect!
ReplyDeleteCheers Phil!
DeleteWhat a superb looking game! That massed cavalry just looks fabulous. There is nothing like a BIG Napoelonic game.
ReplyDeleteCheers Mark, yes large Napoleonic games are hard to beat!
DeleteFantastic table, glorious troops, and a superb narrative. Bravo, Mark!
ReplyDeleteMany thanks Peter!
DeleteThanks for such a tremendous report. I have just picked up the rules, so keenly followed the twists and turns of your game.
ReplyDeleteCheers Norm, and good luck with your own GDA ventures!
DeleteGreat looking game and it sounds like it had a nice big narrative sweep!
ReplyDeleteBest Iain
Cheers Iain, yes indeed had a nice narrative to it!
DeleteHappy days on a Napoleonic battle filled with great looking slaughter. Excellent!
ReplyDeleteSalute
von Peter himself
Many thanks Peter!
DeleteThis is Awesome chasseur!!! What a pleasure watching your troops grow and come to this point!!!!
ReplyDeleteThanks Paul, yes nice to have so many of them on the table at last! And to have the table for that matter! :)
DeleteGreat looking game - beautiful figures, just a shame it was such hard work for the poor old Austrians, I have a soft spot for them having painted hundreds of white coated Sword and Sabre and Old Glory Second Edition figures some years ago...
ReplyDeleteCheers! Yes bit of an Austrophile myself, and many more Austrians to be added to this force!
DeleteChasseur this right up street as you might expect. Excellent game, toys, scenery and write-up, much appreciated. I know exactly where you're going and you're loving it, don't give up on that extra space you want, the extra brigades you need, stick at it, it is...
ReplyDeleteThe Dream.
Best wishes,
Jeremy
Yes indeed, onwards! Thanks for the encouragement Jeremy! :)
DeleteBRAVO!
ReplyDeleteWonderful AAR!
Looking forward to seeing more of your collection in action!
Many thanks Murdock!
Delete