Bataille Empire is the new thing in Napoleonic's rules, by French author Herve Caille. The English translation has only just been released, and my copy had arrived when I got home from work on Friday which was a nice surprise. Over Saturday I played out a small game, pedantically checking the rules to try and get them as correct as I could for a first try! Following is a report of that and a description of some of the mechanics and impressions.

As way of brief inroduction, it's fair to say that I had high expectations of this rule set when I first heard of it, as the author also produced Art de La Guerre rules (ADLG), which are my go to Ancients wargaming set. However, seeing the first pictures of Bataille Empire I was disappointed. Unit sizes were tiny anaemic things - 12 infantry, 4 cavalry(!) or a single artillery piece, and maybe a dozen or so units a side. I realise such numbers may make it accessible for new players who can get started very quickly without a daunting amount of painting and purchasing - but Napoleonics 'the beautiful game', deserves a far more epic canvas in my eyes!
Expressing these concerns, I was helpfully informed by those in the know (e.g. check out the Bataille Empire English Language Facebook group) that basing and unit size is entirely flexible and I could use larger units. So on the strength of the author's past work I made the purchase, figuring also that if anyone can write a good set of Napoleonic rules, surely it has to be a French guy ;) Plus regardless of the combat engine I knew that much of the book would be game setup ideas and army lists, and I was keen to get it for that more than anything else.
Conveniently, I still had figures setup from some playtesting with my own fastplay Napoleonic rules and General D'Armee rules (another well known and popular commerical set, particularly in Britain). See the previous battlereport post to see how this same battle went with these other set of rules.
Jedlinsk - Bataille Empire rules refight
See the scenario and force lists in the previous post for an overview of the situation in this historical battle. As mentioned above, one of the advantages of the Bataille Empire rules (BE from now on), is that they have comprehensive force lists for each nation and year in the back of the book. From this I was able to choose appropriate stats for both the Polish force and Austrians for the 1809 campaign in Poland. I did however tweak these to try and bring them into line with the recommendations in the Michael Hopper scenario book. Also for simplicity in this first game I just made all generals competent, and I used the simplified game sequence as the rules recommend.
The Polish I rated as militia (status can be irregular, militia, line, elite, guard) in this battle, which means their drill is not as good, but they are morale 3 (morale rating ranges from 1-5) so they are reasonably enthusiastic. The Austrians are line, which means they have better drill, but with much of the infantry being morale 2 they are less happy about turning up for battle. Note "Class" listed below is manoeuvre class with "A" being great (slight reduction to move if changing formation, 3+ test as reaction on a D6), "B" ordinary (half a move to change formation, 4+ test as reaction) and "C" poor (full move to change formation, 5+ test as reaction).
Polish - CinC Zajaczek
- Brigade 1: 4 Recruit Line, 1 Regular Foot Artillery Battery, 1 Regular Skirmisher
- Brigade 2: 4 Recruit Line, 1 Regular Foot Artillery Battery, 1 Regular Skirmisher
- Brigade 3: 3 Recruit Uhlans
For the Polish in this battle, for BE I used the following stats:
- Recruit Line were: Militia, Morale 3, Class C
- Recruit Uhlans were: Militia, Morale 3, Class B, Lance
- Artillery were: Line, Morale 3, Class B
- Skirmishers were: Line, Morale 3, Class B
Austrian - CinC Mondet
- Brigade 1: 2 Large Regular line, 1 Regular Light (Grenz), 1 Recruit Line, 2 Regular Heavy Batteries, 1 Regular Skirmisher
- Brigade 2: 4 Large Recruit Line, 1 Foot Battery
- Brigade 3: 3 Regular Light Cavalry (2 Hussars, 1 Chevauleger)
For the Austrians in this battle, for BE I used the following stats:
- Regular Line were: Line, Morale 3, Class B, Large,
- Recruit Line were: Line, Morale 2, Class B, Large (one unit is medium)
- Grenz were: Light, Morale 3, Class B
- Light Cavalry were all Line, Morale 3, Class B
- 6 pounder Foot Artillery were: Line, Morale 3, Class B, Short Range
- 12 pounder Heavy Artillery were: Line, Morale 2, Class B, Small, Short Range
- Skirmishers were Line, Morale 3, Class B
Unit Distance?
The next decision was to decide upon how far my standard UD (unit distance) or basic measuring distance for moving and shooting would be. The rules suggest that basing doesn't matter and in fact you can even use different basing to your opponent. A UD though should be roughly half the length of a standard infantry/cavalry line. Given my standard infantry line is 20cm wide, cavalry line 15cm wide, then 7.5 to 10cm UD would seem about right. I decided to go with the 10cm even though that would mean movement ranges and shooting ranges would be pretty huge, as this would mean they are proportional to the infantry as is the stated design intent, and very easy to calculate too (just multiple UD by 10).
Here's the movement then, this number x10cm. 40cm moves for infantry, 80cm for cavalry! Larger even than my own rules. (And yes a not quite complete translation with "mouvement" in French on the quick ref sheet, one of very few errors I've spotted, and none major.)

And here are shooting ranges, 20cm for infantry (30cm if skirmishers), 40cm for canister from the 6 pounders, and an enormous 60cm canister range from the 12 pounders(!). I note there is quite a discrepancy in musketry to canister range between these rules and others I have played. According to the rules one UD is equal to 60m in real life (optionally 50-75m). I won't remark on this further here except to say I found it a little perplexing and and it had me looking at data in Nafziger's Imperial Bayonets (wow 83% off at time of this post, grab a copy if you don't have it!) to see what justification there might be for this.

A standard unit represents approximately 600 infantry or 300 cavalry. However, the rules also suggest you could change this so a standard unit is a regiment of 1200 infantry, or 600 cavalry, and if so the UD does not need to change as far as I can tell. Arguably it should or at least could, so that you would use double sized units but the same smaller unit distance, so half the distance I just gave above. I toyed with this idea but just went with the rules as written in this first game.
The Game
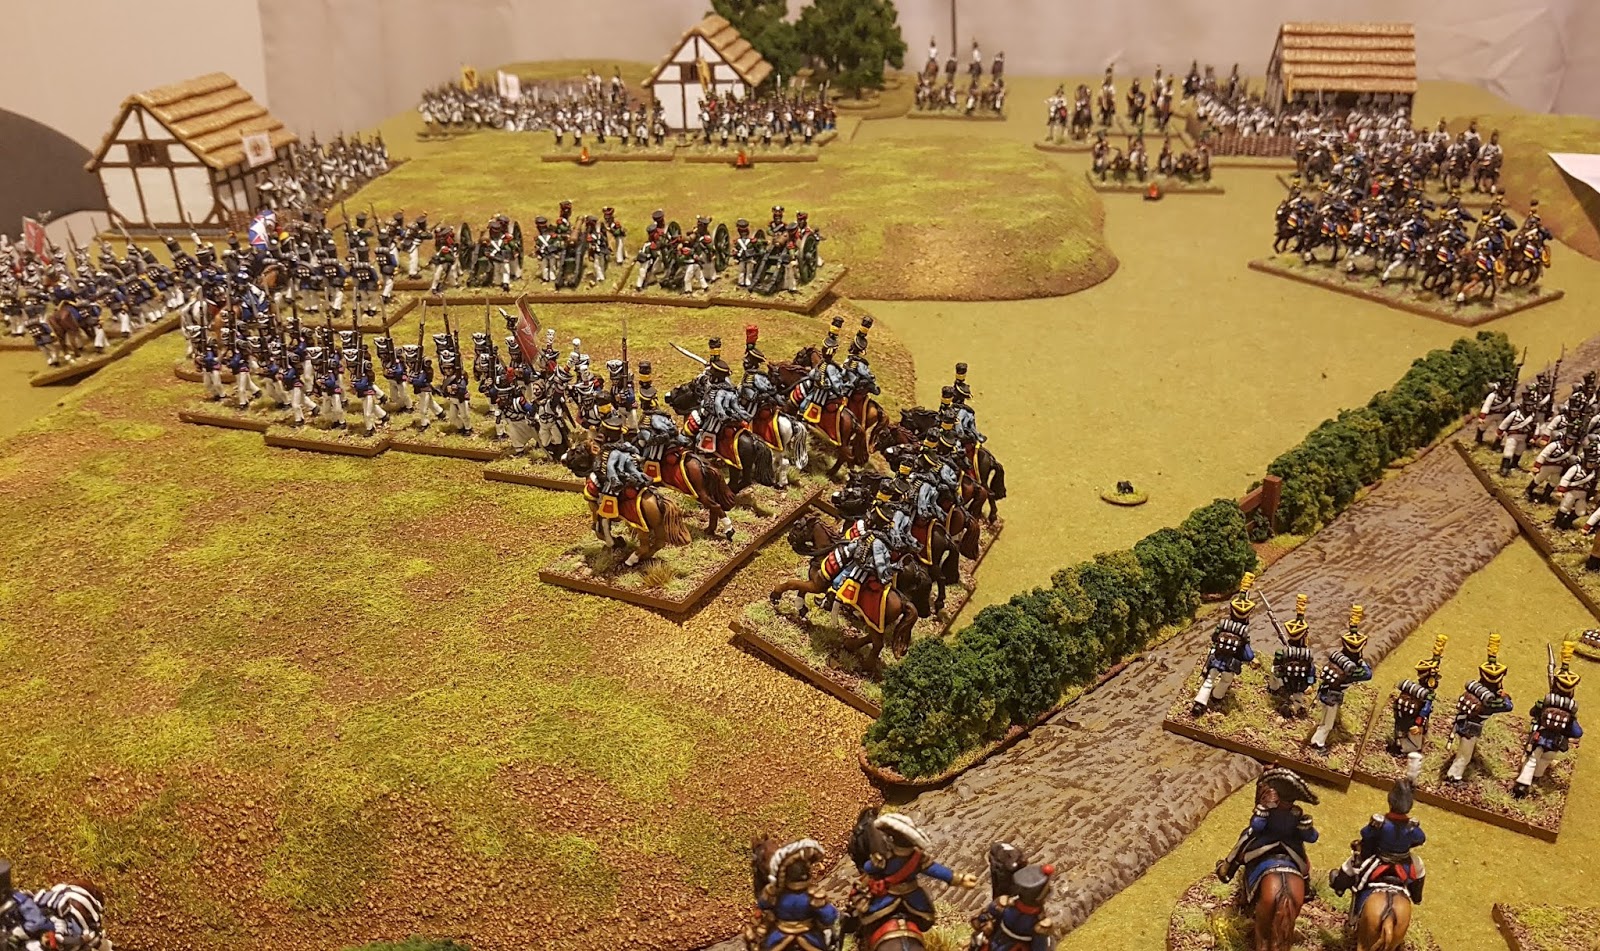
Ok that's enough background, I decided to try and replicate the deployment and tactics that were used in the previous games, for sake of comparison. Here's the initial Austrian move as the attacker, the 12 pounders being slower and lagging behind the 6 pounders a little - giving the first indication of a little more period detail/flavour than either my quick play 321 rules or the General D'Armee rules. Whether such differences really existed or if they did whether they mattered to the extent they are worth bothering with in a wargame is another question of course!

Polish battery fire inflicts a loss on the oncoming limbered 6 pounder battery, but it keeps coming. The other battery fires and causes losses on two columns (bounce through "richochet" fire, which is just as damaging on units within 4UD as on the original target), sending them reeling backwards in disorder as they fail their morale checks. Morale is D6 plus morale value plus a few modifiers and needing 6+ to avoid this disorder result.

Now comes an interesting moment and significant difference from the two previous rulesets. The Polish Infantry wants to form square, but the cavalry is already within "tactical range" of 4UD (40cm). Thus as soon as the infantry start to try and move the cavalry can do an opportunity charge on them, and to change formation to square from line for Class C Militia, seems to be impossible in this circumstance - automatic disorder (5+, -1 for militia, -1 cavalry within 4UD). So they'll have to wait in line and hope the volley is good next turn...

Turn 2
Turn 2 for the Austrians. On the Polish left the Austrians charge into Brod village and eliminate the Polish garrison on a 6-1 roll. Austrians have +2 for column charging, +1 large, +1 equal morale but better status (line to militia). Poles have +1 light cover, -1 Militia, -1 difficult terrain. Score then is total of 10 to 0, a difference of 7 or more which sees loser automatically eliminated and winner pursuing into the village.

Note the disordered Austrian columns in the background from turn 1 though! In BE you completely resolve one division's (Brigades here) activation before moving onto the next, so after this charge resolution the general reorders these two columns. Then the other two divisions will do their activation. Each divisions activation has five phases:
- Command (Generals roll to see how many units they can move)
- Preparatory fire (skirmishers and artillery)
- Charges and shock combat
- Movement and Rallying
- Final fire (units which haven't fired, meleed, or multiple moved can fire)

Then on come the Austrian Hussars, and Polish milita aim their muskets shakily...
(Effect of shooting is included in the shock combat roll, as are all the other factors like testing to charge, testing to hold, etc, that some other rules separate out. Thus fast resolution, something the author comments on as a design feature to avoid tedium of these processes in other rules).

First Polish unit times it well apparently as the roll is good (black die for Poles, white die for Austrians of course). I've put the modifiers as little green dice next to the units to show the factors. The Polish here I believe have two safe flanks (+4), from the nearby friend and board edge (which represents side of valley in this scenario), and militia (-1), for total of +3. Hussars have charging light cavalry (+1), rear support from the Chevauleger (+1), General attached (+1), and when morale is equal as here, line is a higher status than militia (+1) for total of +4. The attached general would be killed on a 10+ on 2D6 at start of combat but he lives. So the Poles win by 1 and the cavalry takes a loss and falls back in disorder.

Second combat same thing happens, and these Hussars also fall back with a loss in disorder. Poles have held, but only thanks to higher dice rolls and if beaten by the Cavalry it would have been all over for them!

Polish turn, and it's time to canister the limbered 6 pounders which take another loss and fall back in disorder.

The 6 pounder battery with some recently repelled Hussars...
(Note: I stopped retreats at table edge unless in contact with it already in this game, given the huge move distances of up to a metre. Similarly, I decided that passage of lines needed just any gap rather than a full UD each side of a unit, assuming that the space a unit takes up automatically includes this distance given the scale I'm using and for playability reasons on this 6x4 table. In the rules if you don't have a UD gap either side of units, you have to go through a unit causing disorder).

Lastly, Austrian artillery opens fire in final fire phase, killing the Polish General and inflicting a loss on the line which nonetheless manages to hold.


End of turn.

Turn 3
Here's the command dice for the Austrian commanders. Two white for the infantry generals, black the cavalry, and red for the CinC. Same as ADLG (Ancient rules by same author), each commander rolls D6 (+ command value which is 1 for all commanders in this game, and can vary between -1 and +3) and then you have half that number of points (rounding up), to move and rally units, each unit or group costing one point. A group is units within 2UD (20cm) of each other facing the same direction, moving same way. The CinC can give his points to any general he chooses.
Note: In the standard as opposed to simplified game sequence, you also use alternating activations of divisions (Brigades here - but all brigades are called divisions for ease of reference in BE rules as some may be divisions too). This is done according to the orders a division is on and who has won initiative. The simplifed sequence used in this game is recommended for first play throughs, multiplayer refights and those who don't want to use the order system. The CinC in the standard game also changes orders of divisions (e.g. Attack Orders, Hold Orders, Manoeuver orders etc) and some other things (e.g. personally lead a unit), all of which seems fairly standard.

Preparatory fire by the Austrian guns. 12 pounder cannon fire inflicts a loss and disorder on the right infantry unit (shot at by the battery on hill which can choose its target at this range due to this placement), then bounces through and inflicts loss and attrition on the cavalry. (Attrition has no combat effect but two attrition becomes a loss, in this battle the shako counters are losses, the backpack counters attrition.)
The left unit takes canister fire and two more losses and also falls back in disorder.
(Checking rules later in turn I realise it should be removed and do so, as militia infantry units can only take 3 rather than 4 losses. Most units take 3 losses, but standard infantry take 4).
(Checking rules later in turn I realise it should be removed and do so, as militia infantry units can only take 3 rather than 4 losses. Most units take 3 losses, but standard infantry take 4).


Then the Austrian infantry advance, the Polish Uhlans opportunity charge, but the Austrians form "column square" (a column with sides turned outwards, which is also what Austrian mass formation counts as in these rules) and repell them.

Austrian skirmishers inflict attrition on the Polish guns, and the reordered Austrian infantry resumes its advance.

Polish have little left to do this turn, except fire. They do so, inflicting another loss on a 12 pounder battery and loss and attrition on the Grenz.


12 pounder battery can only take 2 losses and is now also lost.

Turn 4
Preparatory fire from the Austrian skirmishes now equals a loss on one of the Polish batteries, but it holds.
And mass assault from the Austrians as their three best infantry units charge the Polish line. I'm not expecting this to be a good idea necessarily but lets see how the rules handle it... (Also note the columns here are two bases wide, but after the game checking I realised the large units should probably be 3 bases wide).

Resolving the first unit, which is untouched and has general leading it. The general is instantly killed leading from the front and topples from his horse, so things are not off to a great start for the Austrians.
First attack below with dice rolls. Polish have +3 for line vs infantry (representing closing volleys), +2 for supports (rear and right flank) and -1 for militia (poor musketry drill) for total of +4. Austrians have +2 charging in column, +1 for equal morale but better status (line to militia), +1 support (the extra column behind not in combat), +1 large size, and +1 attached general. This would be +6, but their general has just been killed so they lose that bonus and get an additional -1 for being out of command so actually down to +4. Total 10 to 7 to Poles, would have been 10-9 if general had lived but the result would be the same. The Austrians retreat 40cm in disorder with a loss, to the village behind them. If they had one less on dice they would instead take two losses and flee in disorder (fleeing 60cm).

Next result for large column charging the guns. Now here I cheat a little for the Poles, by moving the supporting infantry behind the guns into base contact with them. I do this because this is the position the infantry should have been deployed in these rules to grant the artillery a "refuge". I.e. the gunners fire the guns and then retreat behind the infantry. Roll here for the artillery then changes from total of +2 to, +3 for artillery with secure flanks (the refuge), +2 for support, and -1 for loss for total of +4. Austrians have +2 for column, +1 support, +1 large size, -1 out of command due to lost general, -1 for loss for a total of +2. This column takes two losses and flees in disorder.

Last one, the Grenz are driven back with a loss in disorder also. The Polish line has held!

Right flank, the Austrian cavalry charge the Polish infantry but are intercepted by an opportunity charge from the Uhlans.

Austrians have +1 charging light cavalry, +2 for supports (1 fire support from the column square, 1 morale support from cavalry), +1 for equal morale but higher status (line to militia). Uhlans have +1 light cavalry, +1 support (other uhlans, infantry can't support except through fire support and they are not in range or arc for this), +1 lance, +1 opportunity charge, for total of +4 also. The Uhlans win and take an attrition for charging, and the Chevauleger retreat with loss and disorder behind their Hussars.

Now pursuit or not for the Uhlans? Sound trumpets and order the recall! I roll to prevent pursuit into the below messy looking outnumbered situation, needing a D6 roll of 5+ (Class B = 4+, but -1 for militia), and the Uhlans manage it and withdraw.


Now the Austrian infantry Brigade advances pushing hard towards the Poles.
Note a cannon shot into the flank of these three massed columns from those Polish guns on the hill would be devastating, but the Polish guns have an action marker as they have already been in shock combat this turn and are thus occupied! Anytime you fire, are in shock combat (charging and melee), take an opportunity action in opponents turn, and a few other things you get an action marker, which limits your actions for rest of the turn.
Note a cannon shot into the flank of these three massed columns from those Polish guns on the hill would be devastating, but the Polish guns have an action marker as they have already been in shock combat this turn and are thus occupied! Anytime you fire, are in shock combat (charging and melee), take an opportunity action in opponents turn, and a few other things you get an action marker, which limits your actions for rest of the turn.

The 12 pounder battery and columns open fire, and the Polish infantry routs. The other infantry column fires on the right flank Uhlans doing another attrition which then becomes a loss but the Uhlans hold. Cavalry can withdraw as a reaction when infantry come within 2 UD (20cm), but only if they don't have action counter which these Uhlans do as they already did an opportunity charge this turn.

Polish turn, and the Uhlans charge the column, which forms column square (D6 roll of 4+ needed, +2 forming column square from column, -1 has action marker from firing, -1 cavalry within 4UD).
Combat dice as below, Uhlans have +1 light cavalry charging, +1 lance, +1 higher morale, for +3. Austrians have +6 for column square (a full square is +7), +1 large size, +1 one safe flank for +8. The Uhlans take an attrition and retreat.

Other flank, a Polish infantry column advances towards Brod village, and together with skirmishers inflicts a loss, disorder and retreat on the last remaining formed Austrian infantry here.

Lastly, right flank infantry brigade, the skirmishers advance and deliver a volley placing attrition on the closest Austrian mass.

End of turn, and there's a big hole in centre of the Polish line...

Turn 5
Preparatory fire from Austrians, skirmishers and the 12 pounder battery firing canister inflict further attrition and now losses on the Polish guns.

A new general is assuming control of the Austrian right flank, which has every formed unit in disorder. Two units are reordered, it would be more but everything is counting out of command (2 command points to do each action) because the general was lost last turn. New General will be one quality level lower too (ordinary rather than competent so no +1 to roll, and being replacement general has learned his lesson and won't lead any charges either!).

The Austrian cavalry sweeps into the central hole. Final fire phase the Austrian 6 pounder battery fires roundshot at the Polish battery on the hill, missing them but smashing into the infantry unit behind causing loss and disorder and retreat... oh dear.
Polish turn and their infantry charges and retakes Brod, just managing to rout the disordered Austrian regulars. Polish have +2 enemy disordered, +1 support, +1 enemy with more losses. Austrians have +1 large size, +1 light cover, -1 difficult terrain.
The Austrians take a loss and disorder result, but as they are already disordered they are instead eliminated.
The Austrians take a loss and disorder result, but as they are already disordered they are instead eliminated.

And the Polish batteries re-disorder an Austrian column, and disorder and consequently rout the already disordered Grenz.

But now here is the problem...

No matter which way you look at it this it is terrible. The disordered Poles as soon as they move to try and reorder trigger an opportunity charge from the Hussars, with almost certain destruction (possibly even certain destruction) and then pursuit into rear of more Polish units. Or they pass in their own turn and the Austrians do same thing immediately start of their turn. This is an unavoidable disaster. I throw a few dice for both sides, and without bothering to work out exact odds I know enough from the dice throws and past reading of factors to realise the Polish situation is lost.

And that's even without looking at the vast Austrian massses advancing on the Polish right, or the Cavalry threatening the guns with a flank charge now... it's all over. Game called end of turn 5.

Conclusion
Well that is now the 5th refight of this battle with same historical conclusion, under three different rulesets. The Poles in this game managed to throw back initial attacks and had the entire Austrian right flank (the best Austrian infantry) in disordered retreat after the rash assault attempted by the Austrians. Two Austrian infantry units and a 12 pounder battery were lost, as compared to three Polish infantry units, prior to the turn 5 checkmate. Many surviving Austrian units were in a poor way, though so were most of the Polish ones.
Given the scenario description, under BE I think I would probably give the Poles their standard hit points rather than one less for being militia in this game, or make them line rather than militia, and maybe tweak some other things (e.g. make the Austrian command worse). However, I don't think these tweaks would make much difference as discussed in the previous report! After five episodes of this I'm also reluctant to inflict more of this scenario on the poor Poles for now!
Given the scenario description, under BE I think I would probably give the Poles their standard hit points rather than one less for being militia in this game, or make them line rather than militia, and maybe tweak some other things (e.g. make the Austrian command worse). However, I don't think these tweaks would make much difference as discussed in the previous report! After five episodes of this I'm also reluctant to inflict more of this scenario on the poor Poles for now!
The main purpose of this post though, is that hopefully it provides an initial idea of how Bataille Empire plays at this sort of scale. This is not of course a review of BE, just an overview of a first test game. As I said above, I didn't buy Bataille Empire for the combat engine in any case, but rather for the army lists, scenario and pickup game setup ideas, which are sorely underdeveloped in most Napoleonic rulesets. From past work from this author, and the fact that over half of this rulebook is devoted to such material, I trusted this alone would be useful and make the purchase worthwhile, and I'm already happy with it from that perspective. However, I will say from this game it seems the combat engine also works well enough and is flexible enough to work with these larger unit sizes. After some more experience and thoughts I will do a proper review giving my thoughts on Bataille Empire in more detail. I also have reviews on three other rulesets almost complete so will be posting them too.
Don't know this battle, nut it looks great and intense...Nice report!
ReplyDeleteCheers Phil, yes pretty intense describes it well, for the Poles especially!
DeleteNice work Mark. Good to see some write ups of BE in english.
ReplyDeleteThanks Matt!
DeleteSounds like an interesting ruleset and worth further investigation, always nice to see your figures on the table,but it would be nice to see some of the later battles,I'm beginning to feel sorry for the Polish troops!
ReplyDeleteBest Iain
Cheers Iain, yes time to move on to something else I think! :)
DeleteMark, I have enjoyed your rules’ comparisons using this benchmarking battle. I,too, feel sorry for the Poles!
ReplyDeleteThanks Jonathan, yes its been interesting to see it, but enough already for the Poles! :)
DeleteThis comment has been removed by the author.
ReplyDeleteCheers Daniel Moreno! Note a UD should be two base widths though if using double sized units as I was, which makes sense and is what the rules say - check page 18 left column.
DeleteAlways interesting to see this kind of side by side (by side) comparison of three different rules sets, none of which I have played (although I have in mind to give your own 123 rules a spin some time!). Thanks for the time it takes to write up things like this!
ReplyDeleteThanks Peter, yes it took a while to write this one up but figured it might be interesting and helpful for a good number of people! :)
DeleteInteresting comparison, Mark.
ReplyDeleteThanks Dmitry!
DeleteNice write up and explanation.
ReplyDeleteCheers! :)
DeleteInteresting synopsis Mark. The look of these reminds me of the 'Histoire et Collections' books which I have on the shelf.
ReplyDeleteThanks Lawrence!
DeleteInteresting. I was under the impression that infantry in line in BE is two bases wide. Looks like your units in line are four bases wide. Wonder if this affects the game?
ReplyDeleteHi Ken, my units were double sized for this game, as BE is flexible enough to handle larger units if you want. It just means you have to double distances as described above in this post.
DeleteI have been wanting to get to this report for some time and I was not disappointed, another engrossing and interesting write-up, thanks Mark. Even though you say that it is not a review of the rules, a playtest is the best form of review that there is, especially when it is accompanied with such interesting discussion and observation as yours is.
ReplyDeleteLooking at materials online, I too was put off by the small unit sizes and thought that the rules sounded little different from a lot of existing sets (of the ilk of Shako, General d'Armee). From your write-up I learn that there is more detail than those, so it's closer to an Empire-lite and more nuanced than March Attack perhaps. I'll leave them for now, but they may yet get a guernsey for a test chez moi.
Thanks again.
Glad you found it interesting and helpful, thanks James! Yes there's a lot of overlap with past systems as might be expected, but also some different ideas and detail in there. :)
DeleteNice AAR. That was a big UD you used !
ReplyDeleteI have tried to like BE (do love the set up and lists) but found after several plays that they bogged down too often into too many rules queries and did not really improve on other sets overall.
Thanks Sgt Steiner, yes the setup and lists are a strong point, but I can see that the rules themselves might be characterised as you suggest.
DeleteThanks for such a helpful post. I have the rules and it is really nice to see them working with a bigger figure within the 6'x 4' space.
ReplyDeleteThanks Norm!
DeleteIt may take time preparing these posts but you are read, and it's hugely informative for gamers worldwide!!
ReplyDeleteThanks for the comment! :)
DeleteI enjoyed this and appreciate the insight into the rules, which I own but have not yet played with. I’ll be interested in reading the AAR’s with the other rule sets too.
ReplyDeleteCheers Jon :)
Delete